

Prerequisites: You will need admin access in Splunk On-Call (only admins can manage API keys), and admin access in ResolveAI (only admins can manage integrations).
1. In Splunk On-Call, create an API key
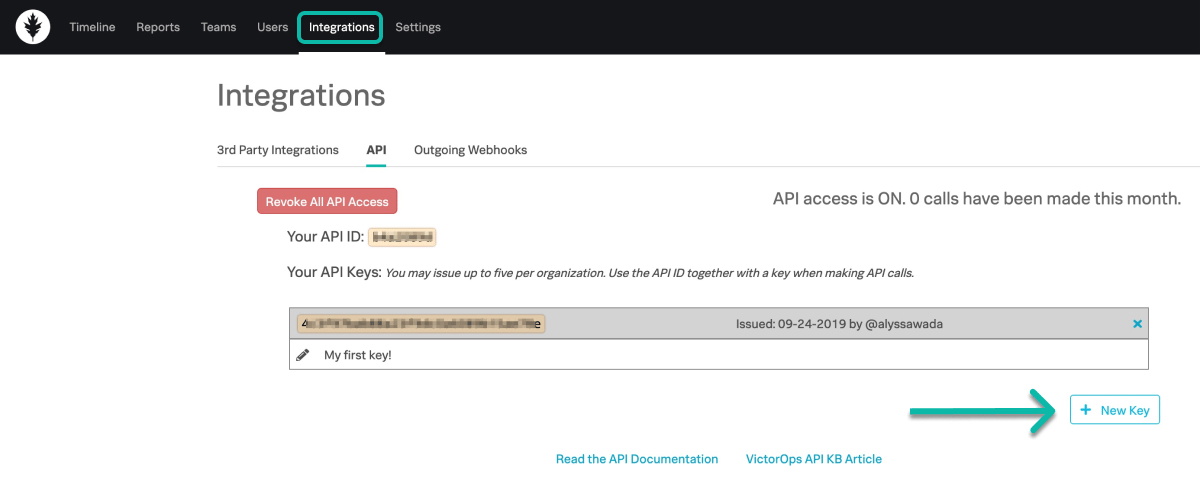
Resolve authenticates to the Splunk On-Call REST API with an API ID and an API Key. Both come from the same page.- Log in to Splunk On-Call as an admin
- Open Integrations, then select the API tab
- Copy the value shown next to Your API ID
- Click + New Key
- Give the key a description, ex.
ResolveAI - Check the Read-only box
- Create the key, then copy the API Key value from the list and store it securely
Use a read-only key. A read-only key is enough to enable every feature described in this guide.
2. (Optional) Find your routing keys
If you only want Resolve to ingest incidents for certain teams, you can scope the connection to one or more routing keys. Skip this step to ingest every incident in the organization.- In Splunk On-Call, navigate to Settings → Routing Keys
- Note the names of the routing keys you want Resolve to ingest
3. In ResolveAI, connect Splunk On-Call
- Open the Splunk On-Call integration page in Resolve
- Click Add Connection
- Enter a Name, ex.
Splunk On-Call - Paste your Api Id from Step 1.3
- Paste your Api Key from Step 1.7
- (Optional) Enter Routing Keys — a comma-separated list, ex.
platform, payments-team. Leave blank to ingest all incidents. - Click Save